Introduction
Datui is an interactive terminal user interface (TUI) for exploring and analyzing data files.
Datui is in rapid development—features and interfaces are evolving.
See It In Action
Use arrow keys or vim-style bindings (j/k for up/down, h/l for left/right) to explore interactively.

For more demonstrations of Datui’s features, see the Demos page.
Getting Started
To get started with Datui, see the Getting Started guide.
Demo Gallery
This page showcases interactive demonstrations of Datui’s features.
Navigation
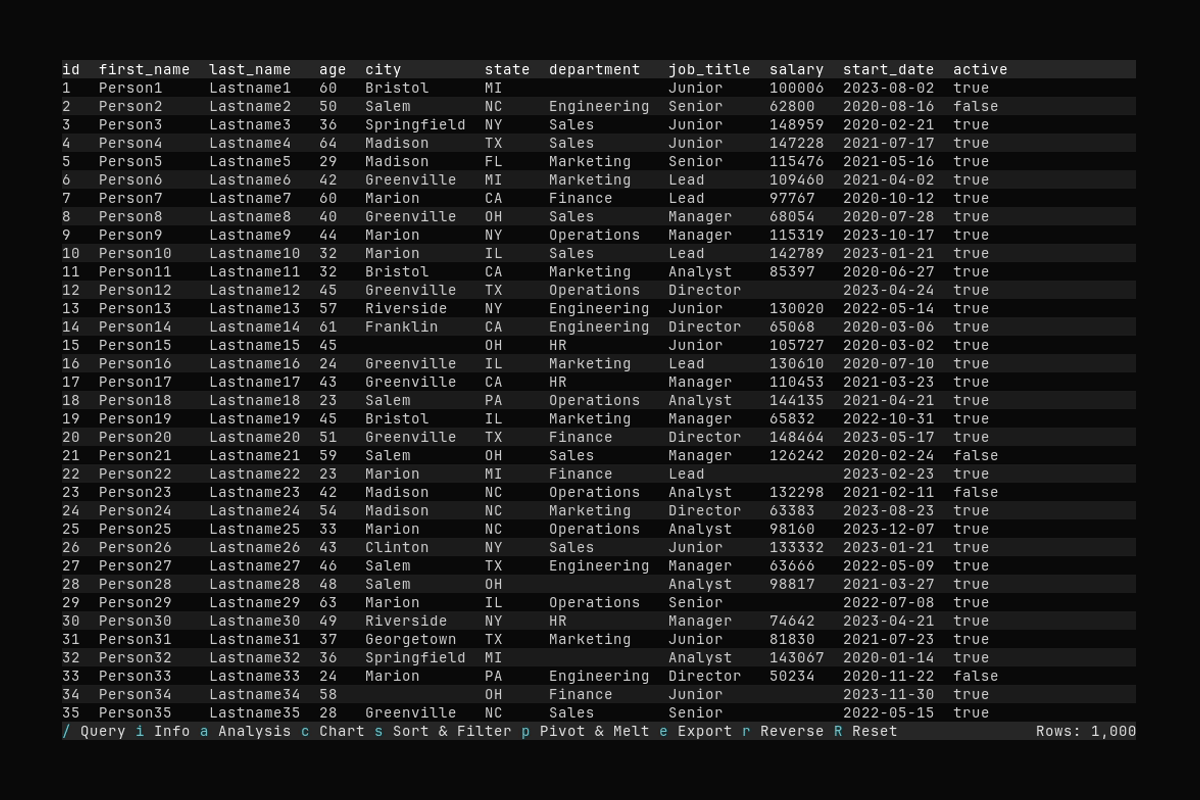
What it shows:
- Loading a Parquet file (
people.parquet) - Scrolling through data using
↑/↓(orj/k) keys
See Loading Data for more information about file formats and options.
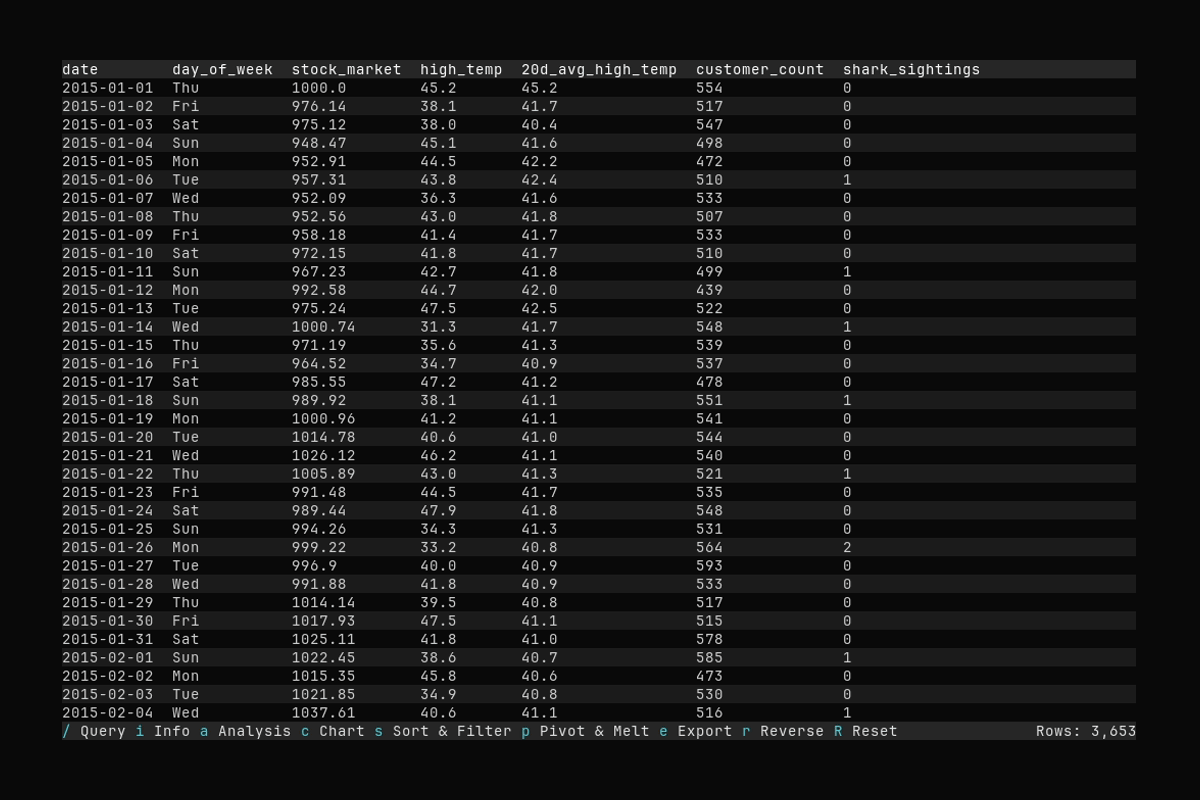
Querying

What it shows:
- Opening the query input with
/ - Typing a query:
select first_name, last_name, city, salary where salary > 80000 - Executing the query and seeing filtered results
See Querying Data for detailed query syntax and examples.
Info Panel

What it shows:
- Opening the Info panel with
i - Viewing information about the dataset
See Dataset Info for details about the Schema and Resources tabs.
Pivot
What it shows:
- Opening the Pivot & Melt dialog with
p - Selecting index columns and applying a pivot (long → wide)
See Pivot and Melt for pivot and melt options.
Melt
What it shows:
- Switching to the Melt tab and selecting index columns
- Applying a melt (wide → long)
See Pivot and Melt for pivot and melt options.
Sorting
What it shows:
- Opening the Sort & Filter dialog with
s - Selecting a sort column and applying the sort
See Filtering and Sorting for sort and filter options.
Filtering
What it shows:
- Switching to the Filter tab and adding a filter (e.g.
dist_normal > 4) - Applying the filter to the table
See Filtering and Sorting for sort and filter options.
Export
What it shows:
- Opening export with
eand entering an output path - Exporting the current data to Parquet in
/tmp
See Exporting Data for supported formats and options.
Correlation Matrix
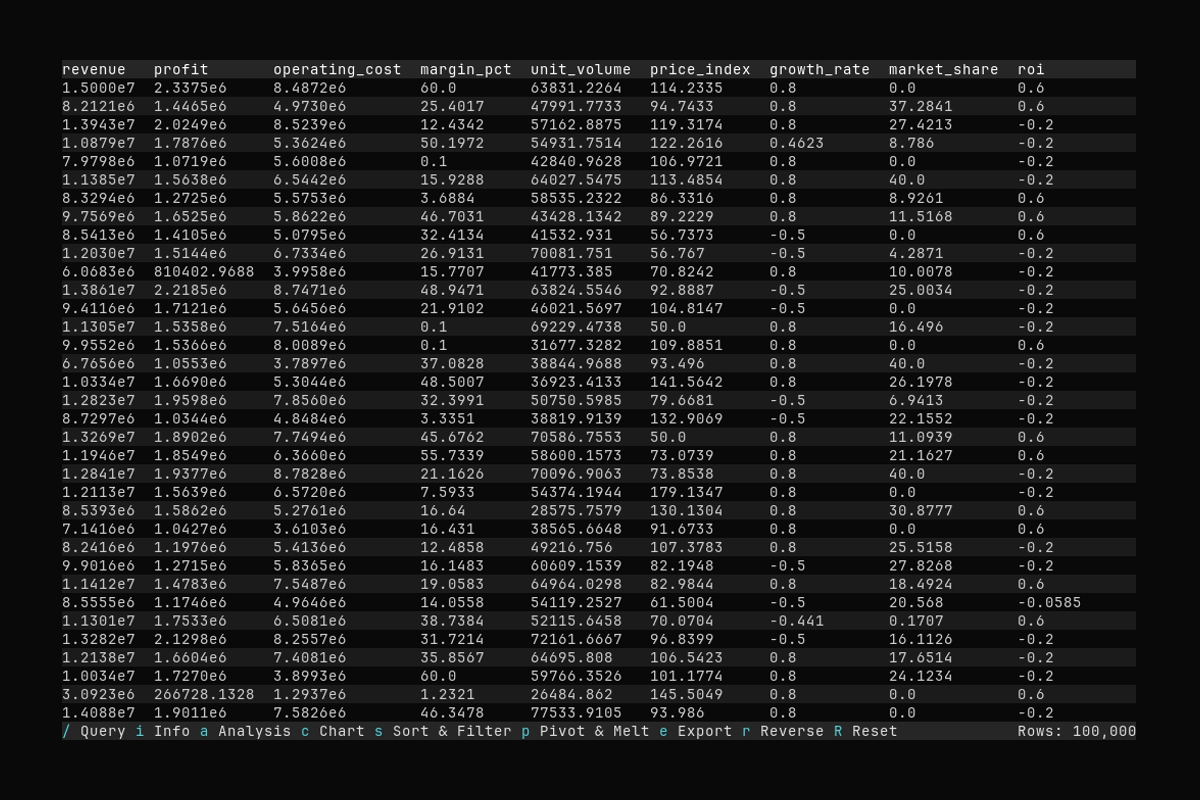
What it shows:
- Opening analysis with
aand selecting the Correlation Matrix tool - Scrolling the correlation matrix
See Analysis Features for details.
Charting
What it shows:
- Opening the chart with
c - Viewing data in a line chart, and then a scatter plot
- Exporting the chart to a PNG file
See Charting for more details.
Getting Started
See the Installation Manual for instructions to get Datui installed.
Once you have Datui installed, have a look at the Quick Start Guide for a brief introduction.
For Developers
See the For Developers section for more information.
Installation
You can obtain Datui from pre-built releases or by comping from source.
Once installed, have a look at the Quick Start Guide.
Compiling from Source
Datui is built using Rust, leveraging its Cargo toolkit for compilation.
To compile a release-quality executable, clone the repository and use cargo to build:
git clone https://github.com/derekwisong/datui.git
cd datui
cargo build --release
If desired, before building you could check out a specific release tag
git tag --list
git checkout <tag from the list>
cargo build --release
The datui executable can be found in the target/release directory.
Run it directly, or copy the file to a location on your PATH environment variable to make it
discoverable by your terminal.
Using cargo install
You may use cargo to install Datui locally into Cargo’s binary cache. (The ~/.cargo/bin
directory on Linux).
cargo install --path .
To run the application you will need to add the Cargo bin directory to your
PATH.On Linux:
export PATH=$PATH:~/.cargo/bin
Installing a Pre-built Release
To acquire a pre-built copy of Datui, you may download one from the Datui Releases Page on GitHub.
Package Managers
Datui is not yet installable with package managers.
Quick Start
Datui is used to visualize tabular data in the terminal.
See the Installation Manual for help installing Datui.
Opening a File
To open a file, simply provide it as an argument.
datui /path/to/file.csv
Datui will load your data into a full screen terminal display.
See the Loading Data section for details about supported file formats and options.
Navigating
You may scroll through your data using the arrow keys, or familiar vim keybindings (j/k for
up/down, h/l for left/right).
You may also jump pages with the Page Up and Page Down keys.
Understanding the UI
- The main Datui view window shows your data in full screen, with a header row at the top and a toolbar across the bottom of the screen.
- The toolbar at the bottom contains a quick reference for the keystrokes to activate the various features of Datui.
- Certain features will open pop-over menus, or change the full screen view. Press
Escto go back to the prior page.
Getting Help
Datui has a built-in help display. Activate it at any time by pressing Ctrl-h. To close it,
press Esc.
Learning More
Now that you understand the basics, learn about the rest of Datui’s features by reading the User Guide.
User Guide
See the Reference section for the details of the command line options, keyboard shortcuts, and query syntax.
Configuring Datui
Datui can be configured to your preferences and needs. Set up a configuration file to make it just right for your preferences. See the Configuration Guide for details.
Loading Data
To learn about the supported formats and features when loading a dataset with Datui, see the Loading Data Guide.
Querying, Filtering, and Sorting
Query Syntax
Datui’s query syntax makes filtering, grouping, and aggregating your dataset easy. You can also use it to make drilling down into subgroups of your data simple.
To learn more about it, see the Querying Data Guide.
Filtering and Sorting Dialogs
In addition to a query language, filtering and sorting can be done by using a dialog window in the TUI. See Filtering and Sorting for more.
Pivot and Melt
See the Pivot and Melt Guide to learn about reshaping your data.
Save your Work with Templates
Save and reapply your queries, sorts, and transformations using the Templates system. Templates save your customizations so they can be quickly re-applied later to the same or similar files.
Analysis Features
Use tools to explore characteristics or extract insight from your data. Datui contains a number of tools, such as:
- Discover relationships with a correlation matrix
- Learn about the characteristics of your data with distribution analysis
See the Analysis Features Guide for full details.
Configuration
Datui supports extensive customization through TOML configuration files. You can customize colors, defaults, performance settings, and more.
Quick Start
Generate a default configuration file:
datui --generate-config
This creates ~/.config/datui/config.toml with all available options and helpful comments.
Configuration File Location
- Linux:
~/.config/datui/config.toml - macOS:
~/.config/datui/config.toml - Windows:
%APPDATA%\datui\config.toml
Configuration Priority
Settings are applied in this order (later values override earlier ones):
- Default values (hardcoded)
- Config file (
~/.config/datui/config.toml) - Command-line arguments (highest priority)
Configuration Sections
File Loading Defaults
Customize how data files are loaded:
[file_loading]
delimiter = 44        # CSV delimiter (44 = comma)
has_header = true     # Whether files have headers
skip_lines = 0        # Lines to skip at file start
skip_rows = 0         # Rows to skip when reading
compression = "gzip"  # Default compression: "gzip", "zstd", "bzip2", "xz"
Display Settings
Control how data is displayed:
[display]
pages_lookahead = 3   # Pages to buffer ahead (smoother scrolling)
pages_lookback = 3    # Pages to buffer behind
row_numbers = false   # Show row numbers on left side
row_start_index = 1   # Starting index for row numbers (0 or 1)
table_cell_padding = 1   # Spaces between columns in the main table (>= 0)
Example: Enable row numbers starting at 0
[display]
row_numbers = true
row_start_index = 0
Performance Settings
Tune performance and responsiveness:
[performance]
sampling_threshold = 10000   # Sample datasets >= this size
event_poll_interval_ms = 25  # UI polling interval (lower = more responsive)
Memory vs Speed:
- Increase
sampling_thresholdto avoid sampling (uses more memory, full accuracy) - Decrease
sampling_thresholdfor faster analysis on large datasets (uses less memory)
Color Themes
Customize the entire UI appearance:
[theme.colors]
keybind_hints = "cyan"              # Keybind hints
keybind_labels = "yellow"           # Action labels
primary_chart_series_color = "cyan" # Chart data
secondary_chart_series_color = "dark_gray" # Chart theory
chart_series_color_1 = "cyan"       # Chart view: first series
chart_series_color_2 = "magenta"    # Chart view: second series
chart_series_color_3 = "green"      # Chart view: third series
chart_series_color_4 = "yellow"    # Chart view: fourth series
chart_series_color_5 = "blue"      # Chart view: fifth series
chart_series_color_6 = "red"       # Chart view: sixth series
chart_series_color_7 = "bright_cyan" # Chart view: seventh series
error = "red"                       # Error messages
success = "green"                   # Success indicators
warning = "yellow"                  # Warnings
dimmed = "dark_gray"                # Dimmed elements
alternate_row_color = "default"    # Background for every other row ("default" = off, or a color name)
Color Formats
Three color formats are supported:
1. Named Colors
keybind_hints = "cyan"
error = "bright_red"
dimmed = "dark_gray"
background = "default"  # Use terminal default background
text_primary = "default"  # Use terminal default text color
Available names:
- Basic:
black,red,green,yellow,blue,magenta,cyan,white - Bright:
bright_red,bright_green,bright_blue, etc. - Grays:
gray,dark_gray,light_gray - Special:
resetordefault(uses terminal default colors - works in both light and dark themes)
2. Hex Colors
background = "#1e1e1e"
sidebar_border = "#007acc"
controls_bg = "#2d2d2d"
- Format:
#rrggbb(6 hex digits) - Case-insensitive:
#FF0000or#ff0000 - Automatically adapted to your terminal’s capabilities
3. Indexed Colors
controls_bg = "indexed(236)"  # Example: specific palette entry
surface = "indexed(239)"
- Direct reference to xterm 256-color palette (0-255)
- Respects your terminal’s color scheme
- Useful for matching specific terminal themes
Terminal Compatibility
Colors automatically adapt to your terminal:
- True color terminals (Alacritty, kitty, iTerm2): Hex colors display exactly
- 256-color terminals (xterm-256color): Hex converted to nearest palette match
- Basic terminals (8/16 colors): Colors map to nearest ANSI color
- Monochrome: Set
NO_COLOR=1to disable colors - Light Theme Support:
- The default values for
backgroundandtext_primaryare set to"default" - Datui will inherit your terminal’s default colors
- The application renders correctly in both light and dark terminal themes
- Be aware that setting explicit colors like
"black"or"white"may result in poor visibility in certain terminal themes
- The default values for
Available Colors
All UI colors can be customized:
| Color | Purpose | Default |
|---|---|---|
keybind_hints | Keybind hints (modals, breadcrumb, correlation matrix) | cyan |
keybind_labels | Action labels in controls bar | yellow |
primary_chart_series_color | Chart data (histogram bars, Q-Q plot data points) | cyan |
secondary_chart_series_color | Chart theory (histogram overlays, Q-Q plot reference line) | dark_gray |
chart_series_color_1 … chart_series_color_7 | Chart view: series colors (line/scatter/bar) | cyan, magenta, green, yellow, blue, red, bright_cyan |
success | Success indicators, normal distributions | green |
error | Error messages, outliers | red |
warning | Warnings, skewed distributions | yellow |
dimmed | Dimmed elements, axis lines | dark_gray |
background | Main background | default (uses terminal default) |
surface | Modal/surface backgrounds | default (uses terminal default) |
controls_bg | Controls bar and table header backgrounds | indexed(235) |
text_primary | Primary text | default (uses terminal default) |
text_secondary | Secondary text | dark_gray |
text_inverse | Text on light backgrounds | black |
table_header | Table column header text | white |
table_header_bg | Table column header background | indexed(235) |
column_separator | Vertical line between table columns | cyan |
table_selected | Selected row style | reversed |
sidebar_border | Sidebar borders | dark_gray |
modal_border_active | Active modal elements | yellow |
modal_border_error | Error modal borders | red |
distribution_normal | Normal distribution indicator | green |
distribution_skewed | Skewed distribution indicator | yellow |
distribution_other | Other distribution types | white |
outlier_marker | Outlier indicators | red |
Query System
Configure query behavior:
[query]
history_limit = 1000      # Max queries to remember
enable_history = true     # Enable query history
Template Settings
Configure template behavior:
[templates]
auto_apply = false  # Auto-apply most relevant template on file open
Debug Settings
Configure debug overlay:
[debug]
enabled = false             # Show debug overlay by default
show_performance = true     # Show performance metrics
show_query = true           # Show LazyFrame query
show_transformations = true # Show transformation state
Example Configurations
Minimal Configuration
Simple customization for common preferences:
version = "0.2"

[display]
row_numbers = true
row_start_index = 0

[theme.colors]
keybind_hints = "blue"
Dracula Theme
Complete Dracula color scheme using hex colors:
version = "0.2"

[theme.colors]
keybind_hints = "#bd93f9"              # Purple
keybind_labels = "#ff79c6"             # Pink
primary_chart_series_color = "#bd93f9" # Purple
secondary_chart_series_color = "#6272a4" # Comment gray
success = "#50fa7b"                    # Green
error = "#ff5555"                      # Red
warning = "#ffb86c"                    # Orange
dimmed = "#6272a4"                     # Comment gray

background = "#282a36"                 # Background (Dracula dark)
surface = "#44475a"                    # Current line
controls_bg = "#44475a"                # Controls bar

text_primary = "#f8f8f2"               # Foreground
text_secondary = "#6272a4"             # Comment
text_inverse = "#282a36"               # Background (for inverse)

table_header = "#f8f8f2"               # Foreground
table_header_bg = "#44475a"            # Current line
column_separator = "#bd93f9"            # Purple
table_selected = "reversed"

sidebar_border = "#6272a4"             # Comment gray
modal_border_active = "#ff79c6"        # Pink
modal_border_error = "#ff5555"         # Red

distribution_normal = "#50fa7b"         # Green
distribution_skewed = "#ffb86c"         # Orange
distribution_other = "#f8f8f2"          # Foreground
outlier_marker = "#ff5555"              # Red
Performance Tuned
Optimize for large datasets:
version = "0.2"

[display]
pages_lookahead = 5   # More buffering for smoother scrolling
pages_lookback = 5

[performance]
sampling_threshold = 50000  # Sample only very large datasets
event_poll_interval_ms = 16 # ~60 FPS polling (more responsive)
High Contrast Theme
Using named colors for maximum compatibility:
version = "0.2"

[theme.colors]
keybind_hints = "bright_cyan"
keybind_labels = "bright_yellow"
primary_chart_series_color = "bright_cyan"
secondary_chart_series_color = "dark_gray"
error = "bright_red"
success = "bright_green"
warning = "bright_yellow"
dimmed = "dark_gray"

background = "black"
controls_bg = "dark_gray"
text_primary = "bright_white"
Command-Line Overrides
CLI arguments always override config file settings:
# Config has row_numbers = true, but disable for this run:
datui data.csv --row-numbers=false

# Override page buffering:
datui data.csv --pages-lookahead 10

# Override delimiter:
datui data.csv --delimiter=9  # Tab character (ASCII 9)
Managing Configuration
View Current Config
Your config file is at ~/.config/datui/config.toml. Edit it with any text editor:
# Linux/macOS
nano ~/.config/datui/config.toml
vim ~/.config/datui/config.toml
code ~/.config/datui/config.toml

# Windows
notepad %APPDATA%\datui\config.toml
Reset to Defaults
Regenerate the default config file:
datui --generate-config --force
This overwrites your existing config with a fresh template.
Remove Configuration
Simply delete the config file:
# Linux/macOS
rm ~/.config/datui/config.toml

# Windows
del %APPDATA%\datui\config.toml
Datui will use default values when no config file exists.
Troubleshooting
Config Not Loading
If your config isn’t being used:
- Check file location: Ensure config is at
~/.config/datui/config.toml - Check syntax: TOML must be valid. Run
datui <file>and check for warnings - Check version: Config must start with
version = "0.2" - Check validation: Ensure values are in valid ranges (e.g.,
sampling_threshold > 0)
Invalid Color
If you see an error about invalid colors:
Error: Invalid color value for 'keybind_hints': Unknown color name: 'notacolor'
Solutions:
- Use valid color names (see list above)
- Use hex format:
#ff0000 - Use indexed format:
indexed(236) - Check spelling and case (names are case-insensitive)
Config Parse Error
If TOML parsing fails:
Error: Failed to parse config file: expected newline, found ...
Solutions:
- Check TOML syntax at https://toml.io/
- Ensure proper quotes around strings
- Verify no typos in section names
- Regenerate config:
datui --generate-config --force
Colors Look Wrong
If colors don’t look right:
- Check terminal capabilities: Some terminals don’t support true color
- Try named colors: More portable than hex colors
- Try indexed colors: Match your terminal’s palette exactly
- Check NO_COLOR: Unset with
unset NO_COLORif colors are disabled
Table Headers or Toolbar Text Cut Off or Deformed (VS Code, xterm-256)
On some terminals (e.g. VS Code integrated terminal, xterm-256color), custom background colors on headers/toolbar can cause text to render cut off or deformed. By default, controls_bg and table_header_bg use indexed(235), which works well on most setups.
If you see deformed text, set them to "default" or "none" for no custom background:
[theme.colors]
controls_bg = "default"
table_header_bg = "default"
See Also
- Command-Line Options - CLI flags that override config
- Quick Start Guide - Getting started with datui
- Keyboard Shortcuts - Available keybindings
Loading Data
Load data with Datui by passing it command line options and a path to open.
Supported Formats
- Parquet
- CSV (or other delimited text formats)
- NDJSON (
.jsonlfiles) - JSON
Compression
Compressed files will be identified by extension and decompressed before loading.
Command line options may be used to set the compression used when there is no extension or it is incorrect
Supported Compression Formats
- gz
- bzip2
- xz
Hive-partitioned data
You can load a Hive-style partitioned dataset (e.g. a directory tree with key=value segment names such as year=2024/month=01/) by using the --hive flag and passing a directory or a glob pattern instead of a single file.
- Directory: point at the partition root, e.g.
datui --hive /path/to/data - Glob: use a pattern that matches the partition layout, e.g.
datui --hive /path/to/data/**/*.parquet
You may need to quote the glob so your shell does not expand it (e.g.datui --hive "/path/to/data/**/*.parquet").
Only Parquet is supported for hive-partitioned loading. If you pass a single file with --hive, it is loaded as usual and the flag is ignored.
Partition columns (the keys from the path, e.g. year, month) are shown first in the table and listed in the Info panel under the Partitioned data tab.
Querying Data
See the Query Syntax Reference for additional detail about the structure of Datui queries.
Selecting Columns
The select clause can be used to select columns:
select a, b, c
Use select alone to select all columns:
select
Rename columns using the : assignment operator (creates a column d that is the same as a):
select a, b, c, d: a
To create, or query, columns with spaces in their names, use the col["name"] syntax:
select no_spaces:col["name with spaces"]
or
select col["name with space"]: no_spaces
Filtering Results
The where clause can be used to filter results.
select where a > 10
Separate where clause expressions with , (logical and).
Get all data where a > 10 and b < 2:
select where a > 10, b < 2
Use the | to form a logical or between a bool column and a numeric:
select where some_bool | a > 10
Select a, b, and c where a > 10 and b < 2 and (d > 7 or e = 2)
select a, b, c where a > 10, b < 2, (d > 7) | (e = 2)
Calculations and Transformations
There is a simple expression language built-in to the query language using:
+, -, *, and % for arithmetic (the % is division, not modulo).
select a, b: c+d where c > 0
See the Syntax Reference for important details about the expression syntax.
Grouping and Aggregation
The by clause in the query language allows you to group your data, or aggregate it within group.
Enabling Drill-Down with Grouping
Executing a query with a by clause will result in a grouped table. This table can be drilled down into
through the UI by selecting the resultant grouped row and pressing Enter. Go back to the grouped result
by pressing Esc.
select name, city, state, salary by department
Aggregate Queries
Using the same by syntax, you can introduce an aggregation function to summarize your data.
select min_salary: min salary, avg_salary: avg salary, max_salary: max salary by department
Filtering and Sorting
Open the Sort & Filter dialog with s. The dialog has two tabs:
Sorting demo:
Filtering demo:
- Sort: Manage column order, sort order, locking, and visibility.
- Filter: Add and manage row filters (column, operator, value).
Use Tab / Shift+Tab to move focus; Left / Right on the tab bar to switch tabs. Apply runs changes and closes the dialog; Cancel closes without applying; Clear resets the current tab.
Exporting Data
The data export controls can be used to save your data to a file.
Press the e key from the main window to export your data. See
Keyboard Shortcuts.
Supported Formats
See Supported Formats for details.
Chart View
The chart view shows your current data as a line, scatter, or bar chart.
Press c from the main view to open the chart.
Controls in Chart View
- Chart type: Line, Scatter, or Bar (cycle with ↑/↓ or ←/→ when focused).
- X axis: Search for and select a numeric or temporal column
- Y axis: Search for and select a numeric column
- Options:
- Y axis starts at 0 (defaults to data range)
- Log scale
- Show legend
Tab/Shift+Tabmove focusEscreturns to the main view
Currently, only a single series can be charted at a time.
Export to File
Press e to open the chart export dialog.
- Choose format
- Enter a file path
- Press
Enteror navigate to theExportbutton to export.
If the file already exists, you will be asked to confirm overwrite.
Extensions (like
.png,.eps) are added automatically if missing.
Configuration
Series colors can be configured in theme.colors as chart_series_color_1 through chart_series_color_7. See Configuration.
Dataset Info Panel
The Info panel shows technical details about the loaded dataset. Press i from the main view to open it. Esc or i closes it.
Navigation (when the panel is open):
- Tab / Shift+Tab: On the Schema tab, move focus between the tab bar and the schema table. On the Resources tab, focus stays on the tab bar.
- Left / Right: On the tab bar, switch between Schema and Resources.
- ↑ / ↓: When the schema table has focus (Schema tab), scroll the column list and change the selection. The first row is selected by default when the Schema tab is active.
Tabs
Schema
- Rows (total) and Columns: Size of the full dataset (not the visible slice).
- Columns by type: Counts per data type (e.g.
Int64: 3 · Utf8: 2). - Schema: Known / Inferred: Parquet uses a stored schema (Known); CSV and JSON infer types (Inferred).
- Column table: Name, type, source, and for Parquet files optionally Compression (codec and ratio per column).
Resources
- File size: Size on disk (when loaded from a file).
- Buffered (visible): Estimated memory of the currently buffered slice (not the full dataset).
- Parquet: Overall compression ratio, row groups, version, and Created by when available.
- Format: Detected format (CSV, Parquet, JSON, NDJSON).
See also
Analysis Mode
Use Datui to get insights about your data.
For large datasets, analysis tools operate on sampled data. This means that a subset of the data will be drawn. You can resample the data with the
rkey.You may adjust the size threshold at which the full dataset will not be used and instead be sampled. See Configuration for details about adjusting the threshold.
Starting Analysis Mode
Open analysis mode using the a key.
See Keyboard Shortcuts for more key bindings.
You will see a collection of tools on the right. Using the Tab key to navigate to the list,
select a tool to analyze your data with. The Describe tool is selected by default.
To exit analysis mode, press the Esc key.
Tools
Describe
Displays summary statistics about your data, similar to Polars’ describe.
Distribution Analysis
- Compares your data against a set of hypothetical distributions and suggests the best fit.
- Select a column and press
Enteron it to view a Q-Q plot and a histogram for the column.
Correlation Matrix
Discover the relationships in your data with the correlation matrix tool. Colors are used to note the degree of correlation.
Pivot and Melt
Datui supports reshaping tabular data between long and wide formats via the Pivot & Melt dialog.
Open it with p from the main view.
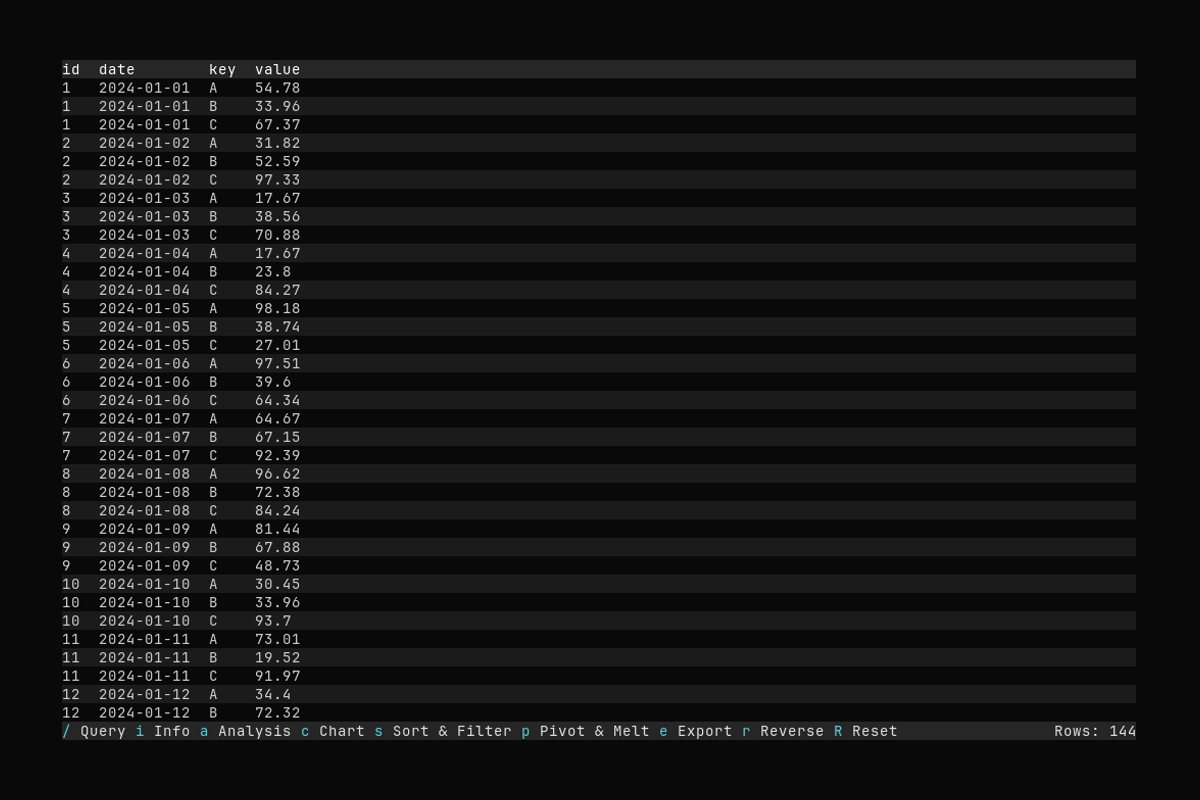
Pivot demo:
Melt demo:
- Pivot (long → wide): Turn rows with a key column into new columns. Example:
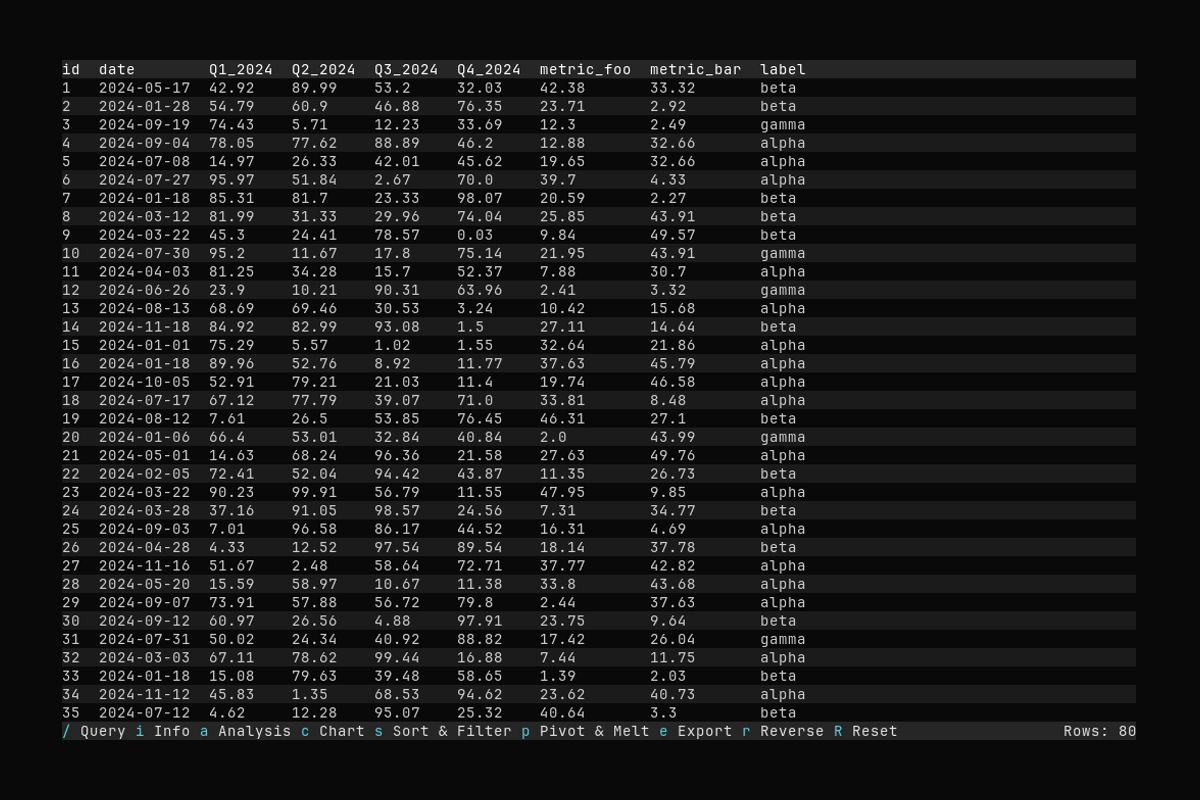
id,date,key,value→id,date,key_A,key_B,key_C. - Melt (wide → long): Collapse many columns into
variableandvaluecolumns. Example:id,Q1,Q2,Q3→id,variable,value.
Both operations run on the current table—i.e. the result of any filters, sorts, or queries you’ve applied. You can filter or sort first, then pivot or melt that view.
Pivot (long → wide)
Pivoting a table is by nature an eager operation. To form the columns, the data must be read. Be sure to filter or query the data as appropriate before pivoting to manage memory usage.
- Index columns: Group columns that stay on the left (e.g.
id,date). Use the filter to search, Space to toggle selection. Order matters. - Pivot column: The column whose distinct values become new column headers (e.g.
key→A,B,C). Use ↑/↓ to select. - Value column: The column whose values fill the new cells. Use ↑/↓ to select.
- Aggregation: How to combine multiple values per group: last, first, min, max, avg, med, std, count. Default is last. If the value column is string-typed, only first and last are available.
- Sort new columns: Toggle to sort new column names alphabetically.
Apply runs the pivot and closes the dialog. Cancel or Esc closes without changing the table. Clear resets the form.
Melt (wide → long)
- Index columns: Columns to keep as identifiers (e.g.
id,date). Same multi-select pattern as Pivot. - Value-column strategy:
- All except index: Melt every column not in the index. Good default when you want to unpivot all measure columns.
- By pattern: Regex over column names (e.g.
Q[1-4]_2024,metric_.*). Type the pattern in the Pattern field. - By type: Melt all Numeric, String, Datetime, or Boolean columns (excluding index).
- Explicit list: Manually pick value columns with Space to toggle.
- Variable name / Value name: Output column names for the melted dimension and values. Defaults:
variable,value.
Apply runs the melt and closes the dialog. Cancel or Esc closes without applying. Clear resets the form.
Keyboard Shortcuts
- Tab / Shift+Tab: Move focus (tab bar → form fields → Apply → Cancel → Clear → tab bar).
- Left / Right: On the tab bar, switch between Pivot and Melt. In text fields (filter, pattern, variable/value names), move the cursor.
- ↑ / ↓: Move selection in lists (index, pivot, value, aggregation, strategy, type, explicit list).
- Space: Toggle selection in index and explicit value lists; toggle “Sort new columns” in Pivot.
- Enter: Activate focused control (Apply, Cancel, Clear).
- Esc: Close dialog without applying.
- Ctrl+h: Show help.
Templates
Pivot and melt settings can be saved in templates. When you save a template from the current view (e.g. after applying a pivot or melt), the reshape spec is stored. Applying that template (e.g. with T for the most relevant template, or from the template manager) will run query → filters → sort → pivot or melt → column order in that order, so the same reshape is applied appropriately in the lazyframe processing flow.
Templates
Datui’s templates allow you to store the queries, filters, and transformations you have applied. This way, you can re-use them with other datasets!
Creating a Template
- To save a template, press the
tkey to load the template dialog - Press
sto save the template - Enter a name and an optional description
- Use the dialog to set additional options and save the template
Loading a template
To load a template, press the t key to load the template dialog. Select the
desired template from the list and press Enter to load it.
Automatically Load Best-Fit Template
Templates are scored against your dataset by a few characteristics to determine if they can be applied to your loaded dataset. The template dialog will indicate the fit with a symbol on the left-most column of the list.
You may automatically load the best-fit template using the T (capital-T) keybind.
Reference
This section contains information about specific topics.
- Customize with Command Line Options
- See an overview of Keyboard Shortcuts
- Learn about the Datui Query Syntax
Command Line Options
Usage
Usage: datui [OPTIONS] [PATH]
Options
| Option | Description |
|---|---|
[<PATH>] | Path to the data file to open (not required with –generate-config, –clear-cache, or –remove-templates) |
--skip-lines <SKIP_LINES> | Skip this many lines when reading a file |
--skip-rows <SKIP_ROWS> | Skip this many rows when reading a file |
--no-header <NO_HEADER> | Specify that the file has no header |
--delimiter <DELIMITER> | Specify the delimiter to use when reading a file |
--compression <COMPRESSION> | Specify the compression format explicitly (gzip, zstd, bzip2, xz) If not specified, compression is auto-detected from file extension. Supported formats: gzip (.gz), zstd (.zst), bzip2 (.bz2), xz (.xz) |
--debug | Enable debug mode to show operational information |
--hive | Enable Hive-style partitioning for directory or glob paths; ignored for a single file |
--clear-cache | Clear all cache data and exit |
--template <TEMPLATE> | Apply a template by name when starting the application |
--remove-templates | Remove all templates and exit |
--pages-lookahead <PAGES_LOOKAHEAD> | Number of pages to buffer ahead of the visible area (default: 3) Larger values provide smoother scrolling but use more memory |
--pages-lookback <PAGES_LOOKBACK> | Number of pages to buffer behind the visible area (default: 3) Larger values provide smoother scrolling but use more memory |
--row-numbers | Display row numbers on the left side of the table |
--row-start-index <ROW_START_INDEX> | Starting index for row numbers (default: 1) |
--generate-config | Generate default configuration file at ~/.config/datui/config.toml |
--force | Force overwrite existing config file when using –generate-config |
Keyboard Shortcuts
In the main view, the following keyboard shortcuts are available:
| Key | Action |
|---|---|
/ | Query input (See Querying Data) |
p | Open Pivot & Melt controls (See Pivot and Melt) |
s | Open Sort & Filter controls (See Sorting and Filtering) |
e | Open export controls (See Exporting Data) |
a | Open the analysis tools (See Analysis Features) |
c | Open Chart view (See Charting) |
t | Open template manager (See Templates) |
T | Apply most relevant template |
i | Open Info panel (modal); Tab / Shift+Tab move focus (tab bar ↔ schema table); Left / Right switch tabs (See Dataset Info) |
r | Reset (clear query, filters, sort) |
q | Quit |
Ctrl-h | Help |
Query Syntax Reference
This document details the syntax of the Datui query language. For examples and typical workflows, see Querying Data.
Structure of a query
A query has the form:
select [columns] [by group_columns] [where conditions]
select— Required. Starts every query. May be followed by nothing (select all columns), or a comma‑separated list of column expressions.by— Optional. Grouping and aggregation. Everything afterbyup towhere(if present) is the group specification.where— Optional. Filtering. Everything afterwhereis the filter expression.
Clause order is fixed: select → by → where. The parser splits on the keywords where and by (respecting parentheses and brackets), so you cannot reorder or repeat clauses.
The : assignment (aliasing)
Use : to name an expression. The form is name : expression:
- Left of
:— The new column or group name. Must be an identifier (e.g.total) orcol["name with spaces"]. - Right of
:— The expression (column reference, literal, arithmetic, function call, etc.).
Examples:
select a, b, sum_ab: a + b
select renamed: col["Original Name"]
by region_name: region, total: sales + tax
Assignment is supported in both the select and by clauses. In by, it defines computed group keys or renames (e.g. region_name: region, total: sales + tax). Expressions may use column references, arithmetic, literals, and function calls.
Columns with spaces in their names
Identifiers cannot contain spaces. For columns (or aliases) with spaces, use col["..."] or col[identifier]:
select col["First Name"], col["Last Name"]
select no_spaces: col["name with spaces"]
Inside the brackets use either a quoted string ("name with spaces") or a single identifier (no spaces). The same syntax works in select, by, and where.
Right‑to‑left expression parsing
Expressions are parsed right‑to‑left: the leftmost binary operator is the root, and the right subexpression is parsed first (so it effectively binds tighter).
What this means
a + b * c→ parsed asa + (b * c)(multiplication binds tighter).a * b + c→ parsed asa * (b + c)(*is leftmost; the right subexpressionb + cis parsed as a unit).
So “higher‑precedence”‑style grouping happens when you put those operations on the right. You can often avoid parentheses by ordering:
select x, y: a * b + c    →  a * (b + c)
select x, y: a + b * c    →  a + (b * c)
Using parentheses
Use () to override grouping:
select (a + b) * c
select a, b where (x > 1) | (y < 0)
Parentheses also matter for , and | in where: splitting on comma and pipe respects nesting, so you can wrap ORs (or more complex logic) in () and then combine with commas. See Where clause: , and |.
Select clause
selectalone — All columns, no expressions.select a, b, c— Those columns (and/or expressions), in order.select a, b: x + y, c— Columns and aliased expressions.
Columns are separated by ,. Each item is either a plain expression or alias : expression. The same expression rules (arithmetic, col[], functions, etc.) apply everywhere.
By clause (grouping and aggregation)
by col1, col2— Group by those columns. Non‑group columns become list columns; the UI supports drill‑down.by region, total: sales + tax— Group byregionand a computed expression (e.g. arithmetic).select avg salary, min id by department— Aggregations per group.
By uses the same comma‑separated list and name : expression rules as select. Aggregation functions (avg, min, max, count, sum, std, med) can be written as fn[expr] or fn expr (brackets optional).
Where clause: , and |
The where clause combines conditions using two separators:
,— AND. Each comma‑separated segment is one ANDed condition.|— OR. Within a single comma‑separated segment,|separates alternatives that are ORed together.
Parsing order:
- Split the where part on
,(respecting()and[]). Each segment is ANDed. - Within each segment, split on
|. The pieces are ORed.
So:
where a > 10, b < 2→(a > 10) AND (b < 2).where a > 10 | a < 5→(a > 10) OR (a < 5).where a > 10 | a < 5, b = 2→(a > 10 OR a < 5) AND (b = 2).
Interaction of , and |
, has broader scope than |: it splits the where clause into top‑level AND terms. | only groups within one of those terms. So:
A, B | C=A AND (B OR C).A | B, C | D=(A OR B) AND (C OR D).
To express (A or B) and (C or D), use (A)|(B), (C)|(D). Parentheses keep | inside each AND term. For more complex logic, use () to group OR subexpressions, then separate those groups with ,.
Comparison operators
In where conditions, each comparison operator compares a left-hand expression (often a column) to a right-hand expression (column, literal, or expression).
| Operator | Meaning | Example |
|---|---|---|
= | Equal | where a = 10 |
!= | Not equal | where a != 0 |
<> | Not equal (same as !=) | where a <> 0 |
< | Less than | where a < 100 |
> | Greater than | where a > 5 |
<= | Less than or equal | where a <= 10 |
>= | Greater than or equal | where a >= 1 |
Operators and literals
- Arithmetic:
+-*%(%is division, not modulo). - Comparison: See Comparison operators (where clauses) above.
- Literals: Numbers (
42,3.14), strings ("hello",\"for embedded quotes).
Functions
Functions are used for aggregation (typically in select with by) and for logic in where. Write fn[expr] or fn expr; brackets are optional.
Aggregation functions
| Function | Aliases | Description | Example |
|---|---|---|---|
avg | mean | Average | select avg[price] by category |
min | — | Minimum | select min[qty] by region |
max | — | Maximum | select max[amount] by id |
count | — | Count of non-null values | select count[id] by status |
sum | — | Sum | select sum[amount] by year |
std | stddev | Standard deviation | select std[score] by group |
med | median | Median | select med[price] by type |
Logic function
| Function | Description | Example |
|---|---|---|
not | Logical negation | where not[a = b], where not x > 10 |
Summary
| Topic | Detail |
|---|---|
| Query shape | select [cols] [by groups] [where conditions] |
: | name : expression in select and by |
| Spaces in names | col["name"] or col[identifier] |
| Expressions | Right‑to‑left; right side binds tighter; use () to override |
Where , | AND between top‑level conditions |
Where | | OR within one top‑level condition |
Combining , and | | Top-level , = AND; | = OR within a term. e.g. “A, B or C” ⇒ A AND (B OR C). Use () to group. |
Advanced Topics
For help keeping things fast, see Performance Tips.
Performance Tips
Sampling in Analysis Mode
When you use Datui’s Analysis Mode, the application may automatically sample from your data rather than analyzing every row. Sampling is used to improve responsiveness and keep memory usage low when working with very large datasets.
By default, if your table contains more rows than a set threshold, Datui will analyze a representative sample instead of the full dataset. This threshold can be adjusted in the configuration file. To learn how to change the sampling limit, see the Configuration Guide: Analysis & Performance Settings.
Pivot is Eager
In order to determine all column names, pivot operations materialize all affected data in memory, which may increase RAM usage significantly for large tables.
Do as much filtering on the data as possible before pivoting to keep things manageable.
For Developers
- Written in Rust
- Terminal UI made with Ratatui
- Powered by Polars
- Documented using mdBook
- Demo GIFs created with vhs
Install Rust
If you don’t have Rust installed, please see the Rust Installation Instructions.
Compiling
Compile Datui using cargo:
cargo build              # Debug build (fast build, large binary, debugging extras)
cargo build --release    # Optimized release build (slow build, small binary, optimized)
- The debug build will be available in the
target/debugdirectory - The release build will be available in the
target/releasedirectory
The release build will take significantly longer to compile than debug. But, the release build is faster and has significantly smaller size.
More Resources
- There is a Setup Script that will help you get your environment ready
- Learn how to run the tests
- Build OS packages (deb, rpm, AUR) with Building Packages
- See the Contributing Guide for more
Running the Tests
Running the tests is done using Cargo’s test command.
cargo test
However, the tests require sample data which are too large to add to the repo. Instead, the data must be generated before the tests can be run.
Generating Sample Data
If you used the Setup Script, the sample data has already been generated. To regenerate the data, see the instructions
The tests will automatically run a Python script to generate the sample files if they do not already exist. However, that script has some dependencies.
To install the dependencies, I recommend following the Python Virtual Environment Setup Instructions from the Contributing section.
Once you have a Python virtual environment set up with the requirements.txt from
the scripts/ directory, and activated it, you’re ready to run the tests for the first time.
# activate the virtual environment if sample data is not already generated
source .venv/bin/activate

# run the tests
cargo test
The tests will look for the files and run the generation script if they don’t already exist. Having the virtual environment activated before running tests for the first time ensures the automatic generation goes smoothly.
After the files are built you don’t need to have that environment activated anymore to run tests.
Regenerating or Updating the Sample Data
You can run the data generation script yourself:
python scripts/generate_sample_data.py
The data will not be automatically regenerated in the future. Use the script to regenerate the data when necessary.
Adding Configuration Options
When adding new configuration options to datui, follow this process:
Process Overview
Adding a new configuration option requires updates in 7 places:
- Config struct definition
- Default implementation
- Merge logic
- Comment constants (for generated configs)
- Application code usage
- Tests
- Documentation
Step-by-Step Guide
1. Add Field to Config Struct
Add the new field to the appropriate config struct in src/config.rs:
#![allow(unused)]
fn main() {
#[derive(Debug, Clone, Serialize, Deserialize)]
#[serde(default)]
pub struct DisplayConfig {
    pub pages_lookahead: usize,
    pub pages_lookback: usize,
    pub row_numbers: bool,
    pub row_start_index: usize,
    pub font_size: Option<u8>,  // NEW FIELD
}
}
2. Update Default Implementation
Add the default value in the Default trait:
#![allow(unused)]
fn main() {
impl Default for DisplayConfig {
    fn default() -> Self {
        Self {
            pages_lookahead: 3,
            pages_lookback: 3,
            row_numbers: false,
            row_start_index: 1,
            font_size: None,  // NEW: None = use terminal default
        }
    }
}
}
3. Update Merge Logic
Add merge handling in the section’s merge() method:
#![allow(unused)]
fn main() {
impl DisplayConfig {
    pub fn merge(&mut self, other: Self) {
        let default = DisplayConfig::default();
        // ... existing merge logic ...

        // NEW: Merge font_size (Option fields)
        if other.font_size.is_some() {
            self.font_size = other.font_size;
        }
    }
}
}
Merge rules:
- Option fields: If
other.field.is_some(), take the value - Non-Option fields: If
other.field != default.field, take the value
4. Add Config File Comments
The default config file is populated with comments useful to users.
Add comments to the comment constant array right after the struct definition in src/config.rs:
#![allow(unused)]
fn main() {
#[derive(Debug, Clone, Serialize, Deserialize)]
#[serde(default)]
pub struct DisplayConfig {
    pub pages_lookahead: usize,
    pub pages_lookback: usize,
    pub row_numbers: bool,
    pub row_start_index: usize,
    pub font_size: Option<u8>,  // NEW FIELD
}

// Field comments for DisplayConfig
const DISPLAY_COMMENTS: &[(&str, &str)] = &[
    // ... existing fields ...
    (
        "font_size",
        "Font size for terminal display (optional)\nSet to null to use terminal default, or 8-16 for explicit size",
    ),
];
}Note: Comments are defined next to the struct definition. The config template is generated from Rust code defaults, with all fields commented out so users can uncomment to override.
5. Use in Application Code
Access the config value where needed:
#![allow(unused)]
fn main() {
let font_size = config.display.font_size.unwrap_or(terminal_default);
}
Or pass through App if needed globally:
#![allow(unused)]
fn main() {
app.font_size = config.display.font_size;
}
6. Add Tests
Add tests in tests/config_test.rs or tests/config_integration_test.rs:
#![allow(unused)]
fn main() {
#[test]
fn test_font_size_config() {
    let mut config = AppConfig::default();
    config.display.font_size = Some(12);

    assert_eq!(config.display.font_size, Some(12));
    assert!(config.validate().is_ok());
}
}
7. Update Documentation
Update documentation:
- Add to
docs/user-guide/configuration.md - Mention in README.md if it’s a major feature
Note: Configuration comments are defined in comment constants next to struct definitions (e.g., DISPLAY_COMMENTS, PERFORMANCE_COMMENTS) in src/config.rs. The config template is generated programmatically from these constants.
Implementation Checklist
- Field added to config struct
- Default implementation updated
- Merge logic implemented
- Comments added to comment constant (next to struct)
- Used in application code
- Tests added
- Documentation updated
- All tests passing (
cargo test) - No clippy warnings (
cargo clippy) - Code formatted (
cargo fmt)
Best Practices
Choosing Field Types
-
Option fields: Use
Option<T>for optional settings#![allow(unused)] fn main() { pub font_size: Option<u8>, // None = use default } -
Required fields: Use plain types with sensible defaults
#![allow(unused)] fn main() { pub pages_lookahead: usize, // Always has a value } -
Strings: Use
Stringfor text values#![allow(unused)] fn main() { pub delimiter: String, // CSV delimiter character }
Sensible Defaults
Ensure defaults match existing behavior:
#![allow(unused)]
fn main() {
impl Default for DisplayConfig {
    fn default() -> Self {
        Self {
            pages_lookahead: 3,
            pages_lookback: 3,
            row_numbers: false,
            row_start_index: 1,
        }
    }
}
}
Clear Config Comments
Comments in the comment constants should:
- Explain what the option does
- Show valid values or ranges
- Provide examples
- Note any interactions with other settings
Good example:
#![allow(unused)]
fn main() {
const PERFORMANCE_COMMENTS: &[(&str, &str)] = &[
    (
        "sampling_threshold",
        "Sampling threshold: datasets >= this size will be sampled for statistics\nSet to higher value to avoid sampling, or lower to sample more aggressively",
    ),
];
}
Poor example:
#![allow(unused)]
fn main() {
const PERFORMANCE_COMMENTS: &[(&str, &str)] = &[
    ("sampling_threshold", "Sampling threshold"),
];
}
Validation
Add validation in AppConfig::validate() for constraints:
#![allow(unused)]
fn main() {
fn validate(&self) -> Result<()> {
    // ... existing validation ...

    // Validate new field
    if self.performance.sampling_threshold == 0 {
        return Err(eyre!("sampling_threshold must be greater than 0"));
    }

    Ok(())
}
}
Testing Edge Cases
Test important scenarios:
- Missing values (uses default)
- Invalid ranges (validation catches)
- Boundary conditions
- Config merging (CLI overrides config)
- TOML parsing (valid syntax)
Adding Colors to Theme
When adding new colors to the theme system, follow these additional steps:
1. Add to ColorConfig Struct
#![allow(unused)]
fn main() {
#[derive(Debug, Clone, Serialize, Deserialize)]
#[serde(default)]
pub struct ColorConfig {
    // ... existing colors ...
    pub new_color: String,  // NEW
}
}
2. Add to ColorConfig Default
#![allow(unused)]
fn main() {
impl Default for ColorConfig {
    fn default() -> Self {
        Self {
            // ... existing colors ...
            new_color: "cyan".to_string(),  // NEW
        }
    }
}
}
3. Add to Validation
#![allow(unused)]
fn main() {
impl ColorConfig {
    fn validate(&self, parser: &ColorParser) -> Result<()> {
        macro_rules! validate_color {
            ($field:expr, $name:expr) => {
                parser
                    .parse($field)
                    .map_err(|e| eyre!("Invalid color value for '{}': {}", $name, e))?;
            };
        }

        // ... existing validations ...
        validate_color!(&self.new_color, "new_color");  // NEW

        Ok(())
    }
}
}
4. Add to Merge Logic
#![allow(unused)]
fn main() {
impl ColorConfig {
    pub fn merge(&mut self, other: Self) {
        let default = ColorConfig::default();
        // ... existing merge logic ...

        if other.new_color != default.new_color {  // NEW
            self.new_color = other.new_color;
        }
    }
}
}
5. Add to Theme Parsing
#![allow(unused)]
fn main() {
impl Theme {
    pub fn from_config(config: &ThemeConfig) -> Result<Self> {
        let parser = ColorParser::new();
        let mut colors = HashMap::new();

        // ... existing color parsing ...
        colors.insert(
            "new_color".to_string(),
            parser.parse(&config.colors.new_color)?,
        );  // NEW

        Ok(Self { colors })
    }
}
}
6. Add Comments to Comment Constant
#![allow(unused)]
fn main() {
// Field comments for ColorConfig
const COLOR_COMMENTS: &[(&str, &str)] = &[
    // ... existing colors ...
    (
        "new_color",
        "Description of the new color and where it's used",
    ),
];
}Note: Comments are simple text - they’ll be prefixed with # when generating the config. The field itself will appear as # new_color = "cyan" (commented out).
7. Replace Hardcoded Usage
Find and replace hardcoded colors in widgets:
Before:
#![allow(unused)]
fn main() {
Style::default().fg(Color::Cyan)
}
After:
#![allow(unused)]
fn main() {
Style::default().fg(self.color("new_color"))
// or
Style::default().fg(theme.get("new_color"))
}
Color Naming Conventions
- Use descriptive names:
sidebar_bordernotsb - Be specific:
modal_border_activevssidebar_border(modals vs sidebars) - Group logically:
distribution_normal,distribution_skewed,distribution_other - Consider purpose:
text_primary,text_secondary,text_inverse
Common Patterns
Option Field Pattern
#![allow(unused)]
fn main() {
// Config struct
pub struct Config {
    pub optional_field: Option<T>,
}

// Default
impl Default for Config {
    fn default() -> Self {
        Self {
            optional_field: None,  // No default value
        }
    }
}

// Merge
impl Config {
    pub fn merge(&mut self, other: Self) {
        if other.optional_field.is_some() {
            self.optional_field = other.optional_field;
        }
    }
}

// Usage
let value = config.optional_field.unwrap_or(fallback);
}
Required Field Pattern
#![allow(unused)]
fn main() {
// Config struct
pub struct Config {
    pub required_field: usize,
}

// Default
impl Default for Config {
    fn default() -> Self {
        Self {
            required_field: 10,  // Sensible default
        }
    }
}

// Merge
impl Config {
    pub fn merge(&mut self, other: Self) {
        let default = Config::default();
        if other.required_field != default.required_field {
            self.required_field = other.required_field;
        }
    }
}

// Usage
let value = config.required_field;
}
String Field Pattern
#![allow(unused)]
fn main() {
// Config struct
pub struct Config {
    pub mode: String,
}

// Default
impl Default for Config {
    fn default() -> Self {
        Self {
            mode: "auto".to_string(),
        }
    }
}

// Merge
impl Config {
    pub fn merge(&mut self, other: Self) {
        let default = Config::default();
        if other.mode != default.mode {
            self.mode = other.mode;
        }
    }
}

// Validation
fn validate(&self) -> Result<()> {
    match self.mode.as_str() {
        "option1" | "option2" | "option3" => Ok(()),
        _ => Err(eyre!("Invalid mode: {}. Must be one of: option1, option2, option3", self.mode))
    }
}
}
Resources
- See
src/config.rsfor existing implementations and comment constants (e.g.,PERFORMANCE_COMMENTS,DISPLAY_COMMENTS) - See
tests/config_test.rsfor test examples - Run
datui --generate-configto see the generated config template (all fields commented out)
Questions?
If you’re unsure about:
- Which config section to use: Look at similar settings in existing config
- Merge logic: Follow the patterns in existing merge implementations
- Validation: Add validation if there are constraints on the value
- Testing: Look at existing tests for similar config types
Documentation
Datui uses mdBook to build static documentation web pages from markdown files.
The documentation markdown files can be found in the docs subdirectory.
Build Documentation
Install mdBook
If you used the Setup Script, mdBook is already installed.
Building the documentation requires mdbook to be available in your terminal.
I recommend using cargo to install it. It will be available into your ~/.cargo/bin/,
where the documentation build script will look for it. You may also add that
location to your PATH if you like.
cargo install mdbook
Build
To build the entire documentation site:
scripts/docs/build_all_docs_local.sh
This will populate the book directory with the site’s files.
At the end it will ask you if you would like a server to view the docs, or you
can simply open the index.html with your web browser.
To view locally, you can:
  1. Open book/index.html in your browser
  2. Or use a simple HTTP server:
     python3 -m http.server 8000 --directory book
     Then visit: http://localhost:8000

Start a local HTTP server to view the docs? (y/n)
Generated reference: command-line options
docs/reference/command-line-options.md is generated automatically from the application’s Clap definitions. Do not edit it manually.
The docs build process (build_single_version_docs.sh, build_all_docs_local.sh) copies docs/ to a temp directory, generates CLI options into that copy, then runs mdbook from the temp tree.
To emit the options markdown on demand:
python3 scripts/docs/generate_command_line_options.py              # print to terminal
python3 scripts/docs/generate_command_line_options.py -o path.md   # write to path
Check documentation links
Use lychee to check built documentation for broken links:
cargo install lychee
./scripts/docs/check_doc_links.sh [--build] [--online] [PATH]
--build: Build docs formainfirst (build_single_version_docs.sh main), then check.--online: Also check external URLs (default: offline, internal links only).PATH: Directory to check (default:book/main). Relative paths are resolved from the repo root.
By default the script checks internal links only (--offline), so it runs quickly and does not require network access. Use --online to verify external URLs. The script exits with a non-zero code if any broken links are found.
Demos
The Datui demo animations are created using vhs, which lets you script and record keystrokes to a terminal app.
Prerequisites
VHS
JetBrainsMono Nerd Font
- Get it from nerdfonts.com and install it manually
- Get it from your distribution’s package manager
- Arch Linux
- Other distributions may have their own packages
Define Tapes
The vhs application uses .tape files to script keystrokes. See Datui’s here.
Only tape files matching the {number}-{name}.tape format (e.g. 01-basic-navigation.tape)
are included when generating all demos.
Generating the Animations
Run generate_demos.py to use vhs to generate an animated gif file for each
matching tape. The script builds the debug binary, then runs VHS in parallel (one process per
tape by default, using all available cores).
The script runs a debug build and uses that binary when creating the demos.
# Generate all demos (parallel, uses all cores)
python scripts/demos/generate_demos.py
Or if the script is executable:
scripts/demos/generate_demos.py
Useful command-line options
| Option | Short | Description |
|---|---|---|
--number N | -N | Generate only the demo with this number (e.g. -N 2 for 02-querying.tape). |
--workers N | -n | Number of parallel workers (default: all available cores). |
Examples:
# Generate only the second demo
python scripts/demos/generate_demos.py --number 2

# Generate all demos using 4 worker processes
python scripts/demos/generate_demos.py -n 4
The animations will be placed in the demos directory. A percentage bar shows progress as each tape finishes.
During the creation of the documentation, these animations are copied into a
demos/subdirectory of the generated site. From there, the files may be referenced from within the docs.
Contributing
Thank you for your interest in contributing to Datui!
After cloning the repo, follow the Setup instructions below to get started.
Setup
Setup Script
TLDR: The entire setup process can be automated by running
python scripts/setup-dev.py
The script will:
- Set up the Python Virtual Environment
- Set up pre-commit hooks
- Generate sample data needed to run the tests
- Configure and build the documentation
Run the script again at any time to update everything.
Python Virtual Environment
There are Python scripts in the /scripts directory that are
used to do things like build test data, documentation, and demo gifs.
Setting up a virtual environment with dependencies for these scripts will ensure you can run them all.
A common convention is to create a virtual environment in the .venv/ directory
of the repository. The .gitignore is set up to ignore this location
so that files there aren’t added by mistake.
python -m venv .venv
Then activate the virtual environment.
source .venv/bin/activate
Once activated, install dependencies used to run the availble Python scripts.
pip install -r scripts/requirements.txt
You’re now ready to run the tests.
Pre-commit Hooks
To encourage consistency and quality, the CI build checks the source code of the application for formatting and linter warnings.
This project uses pre-commit to manage git pre-commit hooks which automatically run the same code quality checks in your repository before commits are made.
Installing Pre-commit and Hooks
If you used the Setup Script, the pre-commit hooks are already installed.
-
Install pre-commit:
If you set up a Python virtual environment using the instructions above then you already have everything you need. Activate it and skip this step.
Otherwise, install
pre-commitusing your desired method.# Using pip pip install pre-commit # Or using homebrew (macOS) brew install pre-commit # Or using conda conda install -c conda-forge pre-commit -
Install the git hooks:
pre-commit installThis installs the hooks into
.git/hooks/so they run automatically on commit.Note: You only need the
pre-commitcommand accessible when you need to use it to manually run or update the hooks. Once installed into your repo, the hooks themselves do not requirepre-commit.See the
pre-commitdocumentation for more information about its features.
The following hooks are configured:
-
cargo-fmt: Automatically formats Rust code with
cargo fmt- If code needs formatting, it will be formatted and the commit will fail
- Stage the formatted changes and commit again
-
cargo-clippy: Runs
cargo clippy --all-targets -- -D warnings- Fails if clippy finds any warnings
- Fix them and commit again
Hooks run automatically when you git commit. If any hook fails, the commit is aborted.
Running Hooks
Run all hooks manually:
pre-commit run --all-files
Run a specific hook:
pre-commit run cargo-fmt --all-files
pre-commit run cargo-clippy --all-files
Skipping Hooks
If you need to skip hooks for a specific commit (not recommended):
git commit --no-verify -m "Emergency fix"
Updating hooks
Update hook versions and configurations:
pre-commit autoupdate
Troubleshooting
Hook not running?
- Make sure you ran
pre-commit install - Check
.git/hooks/pre-commitexists
Hooks too slow?
- Only changed files are checked by default
- Use
SKIP=hook-name git committo skip specific hooks
Adding Configuration Options
For detailed instructions on adding new configuration options to datui, see the dedicated Guide to Adding Configuration Options.
Quick summary:
- Add field to appropriate config struct (
src/config.rs) - Update
Defaultimplementation - Add merge logic in
merge()method - Add comments to comment constant (next to struct)
- Use the value in application code
- Add tests
- Update user documentation
The guide includes step-by-step instructions, code examples, merge rules, best practices, and special instructions for adding theme colors.
Building Packages
Datui can be packaged for Debian/Ubuntu (.deb), Fedora/RHEL (.rpm), and Arch Linux (AUR).
Prerequisites
- Rust: Install via rustup
- Python 3: For running the build script
- Cargo packaging tools: Install as needed:
cargo install cargo-deb           # For .deb packages
cargo install cargo-generate-rpm  # For .rpm packages
cargo install cargo-aur           # For AUR packages
Building Packages
Run from the repository root:
# Build a .deb package (Debian/Ubuntu)
python3 scripts/build_package.py deb

# Build a .rpm package (Fedora/RHEL)
python3 scripts/build_package.py rpm

# Build AUR package (Arch Linux)
python3 scripts/build_package.py aur
The script automatically:
- Runs
cargo build --release - Generates and compresses the manpage
- Invokes the appropriate cargo packaging tool
- Reports the output file locations
Options
--no-build: Skipcargo build --release(use when artifacts already exist)--repo-root PATH: Specify repository root (default: auto-detected via git)
# Example: build .deb without rebuilding (artifacts must exist)
python3 scripts/build_package.py deb --no-build
Output Locations
| Package | Output Directory | Example Filename |
|---|---|---|
| deb | target/debian/ | datui_0.2.11-dev-1_amd64.deb |
| rpm | target/generate-rpm/ | datui-0.2.11-dev-1.x86_64.rpm |
| aur | target/cargo-aur/ | PKGBUILD, datui-0.2.11-dev-x86_64.tar.gz |
CI and Releases
The same script is used in GitHub Actions:
- CI (
ci.yml): Builds and uploads dev packages (.deb,.rpm,.tar.gz) on push tomain - Release (
release.yml): Attaches.deb,.rpm, and Arch.tar.gzto GitHub releases
Arch Linux Installation
Arch users can install from the release tarball:
# Download the tarball from a release, then extract and install
tar xf datui-X.Y.Z-x86_64.tar.gz
sudo install -Dm755 datui /usr/bin/datui
sudo install -Dm644 target/release/datui.1.gz /usr/share/man/man1/datui.1.gz
Or use the included PKGBUILD with makepkg.
More Information
For detailed information about packaging metadata, policies, and AUR submission, see plans/packaging-deb-rpm-aur-plan.md.